Install UC InConnect via Group Policy

Installing UC InConnect via Windows Group Policy is an incredibly easy way to install the application on many computers. You can also configure a Group Policy to autostart it at login (detailed on another page).

In this tutorial, we will be setting up a group policy to install and run UC InConnect on the group “Domain Computers”. This can be changed to any group. 

Step 1. Obtaining the Right File Type.

To install an application via group policy it must be packaged as an “MSI” file. The UC InConnect software comes packaged for standalone installations and the MSI file is part of the package. To extract the MSI file from the prepackaged installer file follow this procedure.

  • Begin the UC InConnect installation on any Windows PC.
  • At the first dialog box cancel the installation.
  • Use Windows Explorer and go to “C:\ProgramData\RedPhoenix\Installs\NEC UC Connector”. Note: if you do not see the ProgramData folder in Windows Explorer, click “view” at the top of the window and check the box “Hidden Items”.
  • Copy the file “UcConnector.msi” to a USB flash drive so you can load it on the domain controller in Step 2.

Proceed to the next step.

Step 2. Set up a Network Share

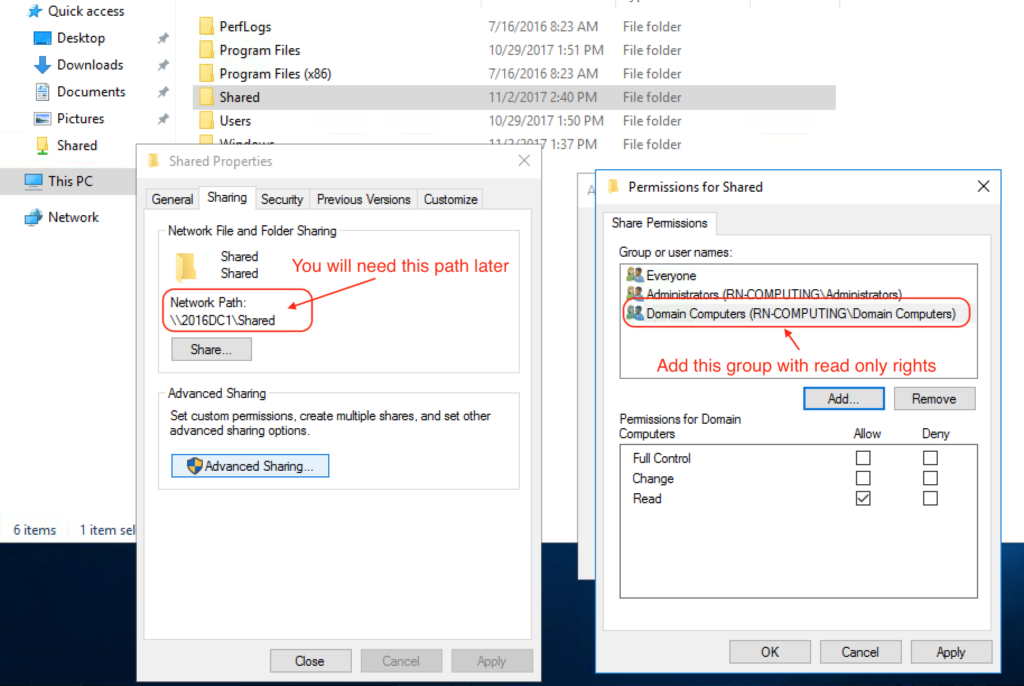
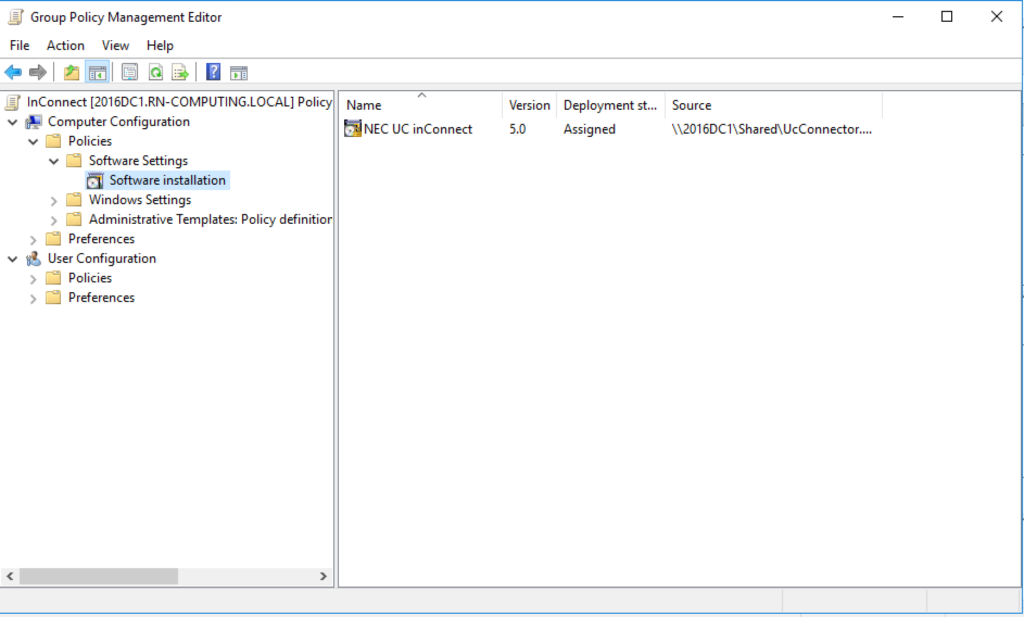
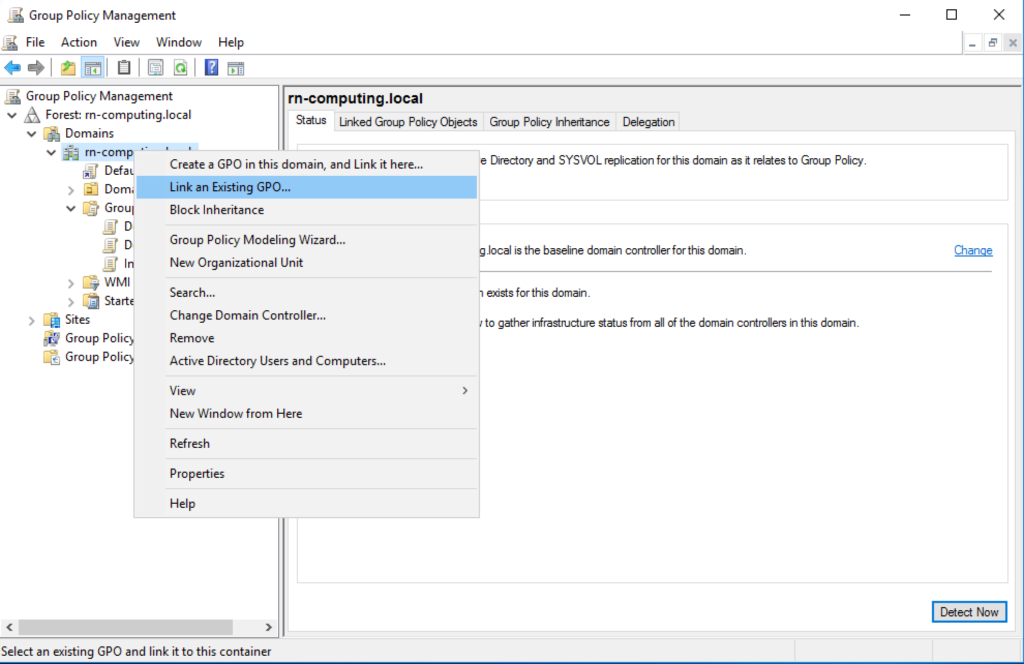
The first step is to set up a network share on the server. In my example, I created a shared folder off the root of the “C:” drive called “Shared”. To make the share hidden you can add a “$” at the the end of the share name.

Make note of the network share. You will need the UNC address later.

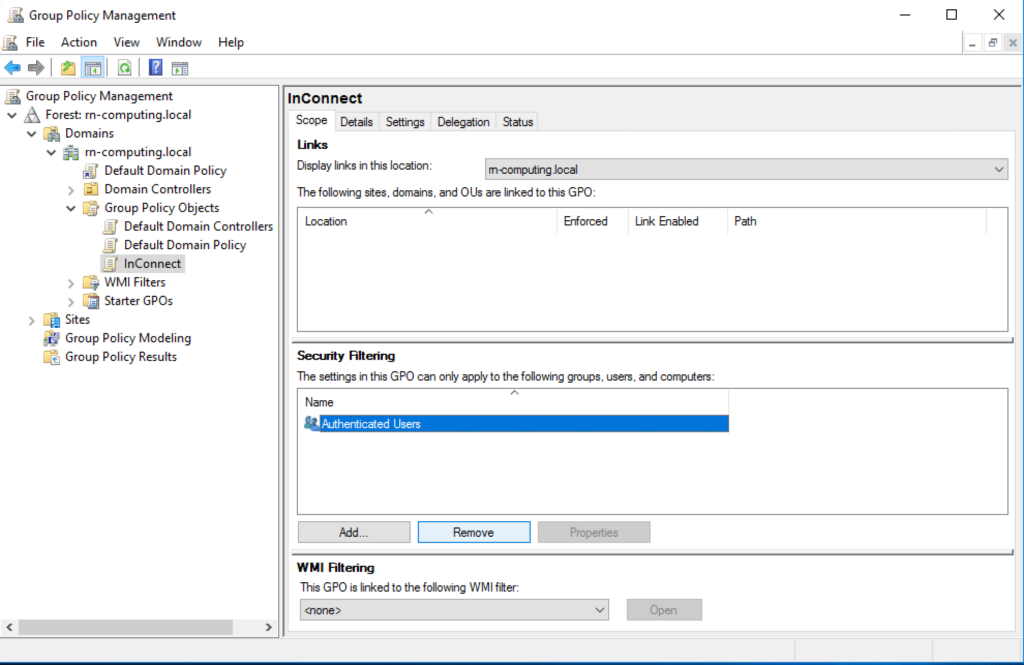
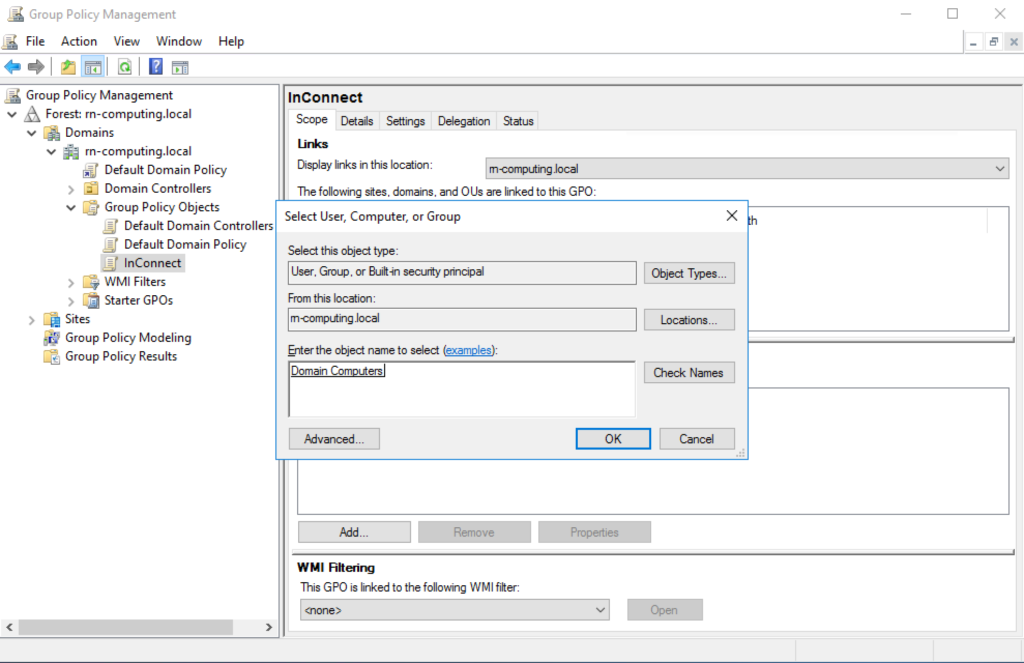
Add the group “Domain Computers” with read access. Adjust the group to fit your needs.

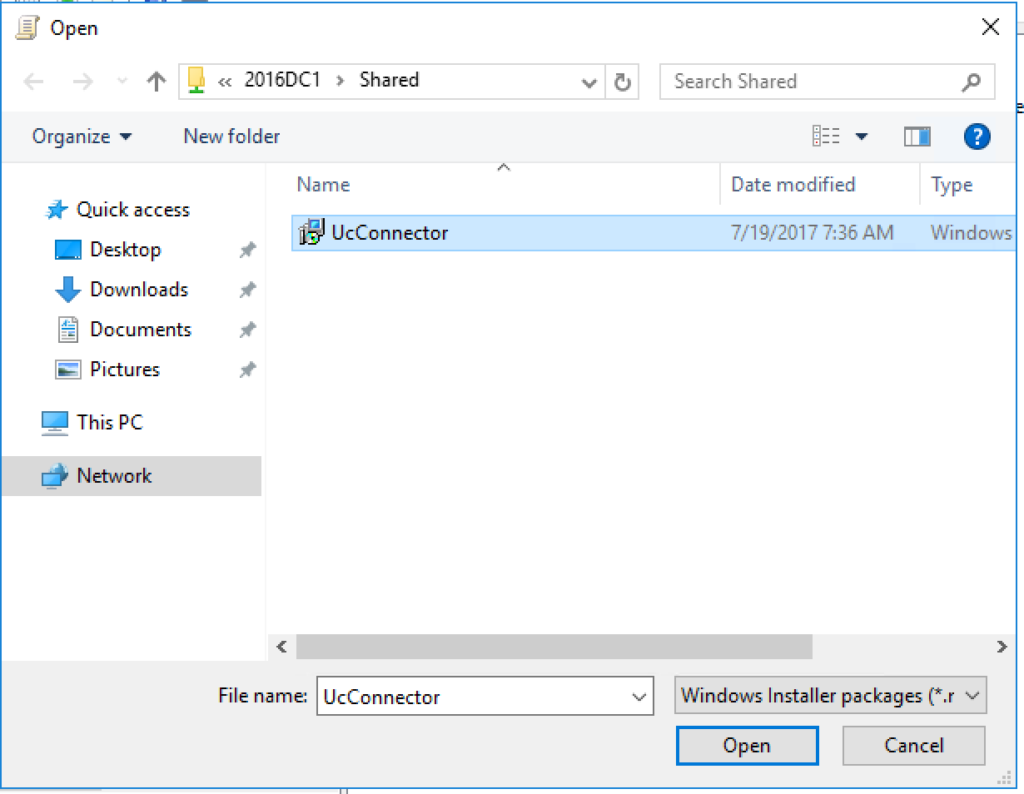
Copy the UcConnector.msi file to this directory.

Step 3. Create a group policy

In this step we will create the group policy that will install UC InConnect on our group of computers in the group “Domain Computers”.

I. Open the Group Policy Management Console to create a new GPO

In the Group Policy Management console right mouse click on Group Policy Object and select “NEW”.

In this example we named the ne policy object “InConnect” so we would easily recognize it in the future. You can name it anything you want.

II. Configure the GPO to install a software Package

Right mouse click on the new Group Policy Object and select “Edit”.

Expand Computer Configuration -> Policies -> Software Settings -> Software installation. 

Right mouse click on Software installation -> New package.

III. Locate the InConnect MSI file

Using the UNC path find the UcConnector.msi file and select it.

A UNC path will be in the format “\\server_name\share\file”. Do not use “C:\….”.

Clcik “Open”.

Make sure Assigned is the deployment method.

Close this box.

III. Adjust the GPO

On the left panel, double click on the GPO you created.

On the right panel highlight “Authenticated Users” and select “Remove”.

Click “Add” and go to the next step.

Add the group “Domain Computers” (or the group of computers you intend to install the UC InConnect on).

Click “OK”.

IV. Link the new GPO to the domain.

Right mouse click on your domain and select “Link an Existing GPO”.

Choose your new GPO and click “Ok”.

You are finished setting up the group policy. Depending on the settings of the domain server, this group policy may not become active for a while. To force an update, open a command window as an administrator and type “gpupdate /force”. It will pause once as it updates so wait several seconds before closing the window.